Thursday, August 30, 2007

Taking It Another Step

As promised yesterday, here is how you can take the little card that we used for the Creating Keepsakes make and take one step further and turn it into a scrapbook page element. For this sample, I used the Hemingway paper. Before making all of these samples, I had thought that Amelia was my favorite of our new paper collections. But now after having worked so much with Mimi and Hemingway, I'm not so sure.

Anyway, back to the sample. I picked this picture because the shirt that I'm wearing in the picture is almost an exact match to the turquoise blue of this cardstock that comes in the Hemingway cardstock collection and because I am beyond grateful for this moment and these kids.

This page is 8x8 and I only had to crop my picture slightly to take out the messy background. I took this picture myself which is why it's such a close up on our faces. I sanded the edge of the picture to distress it a little. Then I mounted it on some of the lightest brown patterned cardstock in the Hemingway pack and then on some of TAC's awesome brown solid cardstock.

I got alot of questions at the convention about how I made the arrow. I actually used the paper that the photo is matted with. If you lifted up the photo, you would see the cut out of the arrow underneath. You've got to save that paper somehow! To make the arrow, I used the Coluzzle circle cutter and cut two tracks apart to make the arc. Then I drew the arrow point on freehand and cut it all out with my favorite retractable knife. I inked the edge with some Jumbo Java ink and stamped the saying with the same. I used mini-bet to spell out the same since I didn't have that exact saying.

Then I used the mini card from yesterday's post as a hidden journaling box. I rounded the corners of the card just so it would stand out a little from all of the other angular elements. Then I added the little tab on the side, which was actually made with this punch, to make it easy to open.

Other elements on the page include inking on the edges, stamp stitching, and a flourish from our Curls & Swirls set. Remember, how I told you that I could just put the pieces of the stitching stamp back together on the block -- that's what I did for this and then I was able to stamp all of the stitching along each side of the page at once.

Wednesday, August 29, 2007

CK Make and Take


Here's a picture of the make and take that we offered at the booth at the Creating Keepsakes convention last weekend. This is a very simple 3x3 card. It would make a great card to go with a small gift or as a thank you to a friend who did something special for you.

To make this card:

1. Cut a 3" x 6" piece of cardstock and fold in half -- in this sample, I used the brown from the Mimi collection.

2. Cut a 2" x 3" piece of patterned paper (again Mimi here -- I love the pink, green and brown combination in this paper pack!).

3. Cut a 1 3/8" x 3" piece of ivory cardstock.

4. Stamp the stitches and saying from Running Stitches and More Abundance with Burnt Umber Ink. For the convention, I cut the running stitches stamp into two 3" pieces and put those pieces with the two sayings from the More Abundance sets on one 3x3 acrylic making it easy for everyone to stamp their card just once. When I want to use the running stitches stamp again, all I have to do is line up the cut edges of the rubber on a long block -- the stamp is really 8" long. You may also want to ink the edge of your patterned cardstock. Glue all of the layers together.

5. Tie a plain knot in the center of a 6" piece of ribbon.

6. Pinch the two tails of the ribbon together and thread through the center of a Bitty Blossom. Use a glue dot to attach the flower to the upper right part of the card.

Tomorrow I will show you how you can take this idea one step further and turn it into an embellishment for your scrapbook page.

Monday, August 27, 2007

CK Convention!

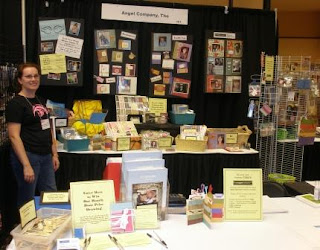
I've been absent from my blog for the last week because it was the first week of school here -- including kindergarten for my youngest (yes, a few tears were shed and no, they weren't from him). But the bigger reason that I've been MIA is that I was preparing for the Creating Keepsakes scrapbook convention in Tulsa this past week. I found out a month ago that I was getting a space at the convention after all. It has been a whirlwind of prep since then. But it was well worth it!

The response to our booth was absolutely AMAZING! We ran out of make and take supplies both days by 3 pm -- sorry if you were in the hotel room next to us and had to listen to the thwack of a paper cutter cutting more at 11 pm on Friday night. We talked to so many great people about The Angel Company -- and so many people who had never heard of TAC before! I can't wait to see some of the ladies that I met this weekend again soon. I know that a few of you will be joining my team soon -- don't forget your contract has to be to TAC by Friday in order to receive the Two to Treasure bonus!

Sunday, August 19, 2007

Saving Pennies

This is one of the projects that we made at my recent home decor
class. I had originally bought these cute Ball brand mason jars to use to store buttons, but when I was making my prototypes for the class, I looked at the jars and thought wouldn't those make something cute. And they did! Here's how we made them:

Unscrew the lid from the jar. Remove the lid and replace the band on the jar. (I will show you a project that I made with the lid on another day!)

Wrap the jar with a 1 5/8"x12" strip of patterned paper. I used Tutti Frutti paper on my jar. Use wonder tape to hold the paper to the jar -- I used a strip at each end and two in the middle. Position the paper so that the ends are on the side with the embossed Ball name if you are using the Ball brand jars.

Stamp your saying on a large double ended tag that coordinates with your strip of paper. In my sample, I used Fun Time for the FUN and Simple Bet to spell out money. At the class, other ladies spelled out Baby Money and Yard Money depending on what they were planning to save for.

Then place one end of 18" of ribbon through the tag and tie the ends with small pieces of coordinating scrapper's floss. Run the ribbon around the jar and through the other end of the tag. Tie tightly again with scrapper's floss. Trim and start filling with coins!

Tuesday, August 14, 2007

Partridge in a pear tree -- not quite

I love our new Hemingway papers -- I'm kind of partial to blue (ah, last name Bluestein -- I have to be) and the blues in the Hemingway paper are a beautiful shade that can look teal or blue depending on what it is paired with. Of course, the paper hoarder in me made me skimp with that patterned paper again. So on this card, I just used a 2" x 4" strip so I could get lots of cards out of the 12"x12" sheet. This was another swap card and a project that we did at my recent team Flying Lessons -- don't you just love that name -- sounds so much better than a "team meeting". I didn't have any of the coordinating cardstock for that Hemingway paper yet when I made this project so we paired it with Blue 2 matchmakers cardstock. It's a close match though not as good as the coordinating cardstock. We stamped the Partridge on ivory cardstock with Cognac ink and sponged cognac ink on the edges. I love this new Partridge Level A hostess set. It has such an art deco kind of look to it. That was matted to a piece of brown TAC cardstock and then added to the card with pop dots.

Saturday, August 11, 2007

Color Inspiration

I love that TAC's new catalog lists the inks that coordinate with the new paper. It makes it so much easier to find the right color when I want my ink to match the paper I'm using. But I also realized the other day when I was making this card that there was another great use for these lists of ink. I knew that I wanted to use three different colors of ink on this card and had the scrap of green as my starting point. The green matches with the Cha Cha paper so I just pulled out my catalog and looked at the list of inks recommended for the Cha Cha paper -- knowing that they would then look good with my green paper!

The other thing that made this card a breeze is that this stamp set is sized to fit perfectly in the Super Jumbo 1 3/8" square punch that we carry in the catalog. I was doing this card for a swap so I just stamped a bunch of each image on some scraps of white and then punched them all out in a row. Wow, fast! And no worrying about straight edges when cutting!

Tuesday, August 7, 2007

Gift With Purchase Stamps

I love our new gift with purchase stamps. This card combines two of the stamps -- Flower Bunch and Simply Put. It is a super simple card and very easy to do. But the saying is all about simplicity and so the card reflects that too.

Remember, tomorrow is the last day to sign up for the Home Decor class. I've just upgraded my printer and that means that you all will get upgraded awesome new instruction sheets with color pictures of the projects.

Sunday, August 5, 2007

Home Decor Class

The deadline to RSVP for the home decor class is quickly approaching -- I need to know by Wednesday whether you want to attend the Friday, August 10, 6:30-9:30 pm session or the Sunday, August 12, 1:30-4:30 pm session. The class fee is $15 and you will get all of the supplies to make the four projects pictured here -- a cool picture frame, a "Fun money" jar to save your change for buying more stamps and paper, a photo clip that could also be a recipe card holder, and a hanging notes board. I used the new Cha Cha paper, Tutti Frutti, and Just Like Dad to create my samples, but you can choose from any of the papers that I have available. I had a blast coming up with these projects and have some other awesome home decor ideas to share with you but that we won't have the time to make at the class. I was so inspired by making all of these items that I'm rearranging my parts of my studio and office again. You'll have to stop by to see it!

Friday, August 3, 2007

And Now We Return to Our Regularly Scheduled Program...

No, I haven't really been on summer hiatus, but my blog has been! I have actually been very busy with kids, VBS, kids, trip to sister's wedding, and more kids. School starts again in 16 days here -- yes, I'm counting the days. My youngest goes to kindergarten this year and while I'm sure that I will cry on that first day, I can not wait to have the freedom of 7 kid free hours five days a week!

In between all of this other stuff, I have actually gotten a lot of stamping done -- and I found out that I will be a vendor at the Creating Keepsakes scrapbooking convention in Tulsa at the end of August! I'm really excited to meet some new scrappers and share The Angel Company's new paper lines with them. The more that I use the papers, the more that I love them! Here are two cards that I've made recently with two different collections.

This first one is one of the cards that we made at my Christmas in July class. The card features our Amelia paper and Christmas Joy stamp set. These two are a match made in heaven for vintage loving stampers! There were a few people who missed the class and so I'm having a make up session on August 15 from 9 am - 12 noon. If you are interested in attending, please let me know soon because I only have 3 seats left.


This card on the right was made using the new plaid in our Toodle Loo collection. There's only 1 sheet of the plaid in the collection and it was really, really hard for me to cut it up to use for this card!! But I cheated and used just 1/2" strips on the back of each side of the black layer so that I could stretch the paper that much further! I was able to get 12 of this card out of just one 4"x12" strip of the paper with this method. That means I still have a 8"x12" piece to drool over. Oh, and the stamp on this card is one of our great new hostess sets, Happy Celebration.